Monday, September 18, 2006
More Work for the Bachelor Kitchen
It's been few months since Yellowbird stubbed her toe back in January while visiting Captain Wilko. The flat nosewheel was fixed in time for me to make my flight back home before dark, but Yellowbird suffered the additional indignity of a cracked nosewheel fairing after the towbar was dropped on it while pulling her clear of the taxiway where the flat occurred. I've been in procrastination mode on the issue of fixing the damage, partly for want of some warmer weather. I went so far as to remove the faring, but I've no more excuses and it's time to do some cosmetic surgery. The Bachelor Kitchen will serve as the operating room.
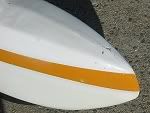 The damage consists of a hole punched through the top of the fiberglass fairing, as well as a 3 - 4 inch crack down the center. The faring wasn't in great condition to begin with. A repair and repaint had been done at some time in the distant past, and the results were less than professional quality. The paint was rough and splotchy, and the trim strip matched the original neither in pattern nor color. Add to that a decade or so of dings from rocks and debris stirred up by the prop wash, and it looks pretty ratty.
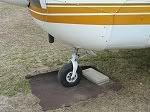 The first job was to remove the fairing. This involved raising the nosewheel off the ground (I actually tied the tail down to get the nose up). removing the nosewheel itself, pulling the faring off, and putting the nosewheel back on.
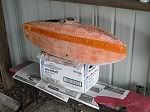 I used Citristrip aerosol stripper, which, as it turns out, is not recommended for use on fiberglass. I didn't have any problems, but maybe Yellowbird's fiberglass is old enough to be impervious to anything milder than open flame. Citristrip does have a lovely orangey fragrance, but I wouldn't recommend using it as a desert topping. Bachelorhood does have it's limits.
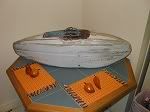 It took several applications of the stripper to get all the paint off. the original paint was revealed during this process, as were several patches of a salmon-colored filler putty. They all came off, exposing bare fiberglass and some original primer which stubbornly refused to come off. Several bouts with sandpaper resulted in a clean and somewhat smooth surface.
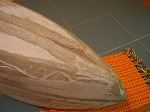 The wound exposed. The fairing was originally built up in two halves, spit down the middle and joined together with fiberglass strips on the inside. The seam was filled on the outside. I cleaned out all of the damaged fiberglass and filler from the crack, leaving a significantly larger wound.
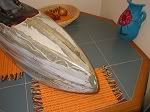 The next step was to apply a couple of generous coats of fresh resin to the damaged area to bond everything back together. I also brushed a coat of resin over all the exposed fiberglass areas to seal them and replace any resin that was removed while stripping the paint.
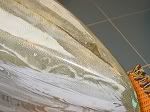 The photo doesn't do justice - it practically glows, like finely finished hardwood. The fresh resin really brings out the natural beauty of the glass fibers.
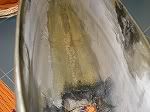 On the inside, I applied a couple of strips of fiberglass to reinforce the joint. All those years of building model airplanes finally paid off.
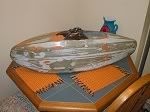 The outside was pretty rough, so it got several bandages of Aeropoxy filler. Then it was time to sand everything smooth. The Bachelor Bathtub was called into service, since wet sanding is a pretty messy endeavor. I'll spare you the pictures.
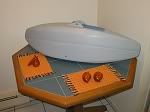 Finally, several coats of primer. And more sanding. And more primer. And sanding. And on and on until everything was a smooth as could be desired. For the finishing touches, I'll need to find a paint match for Yellowbird Yellow. And I may look into getting a more capable painting rig. Until then, I have a nice aero-themed centerpiece for my Bachelor Dining Room.
