Wednesday, November 28, 2007
It Flies! (sort of)
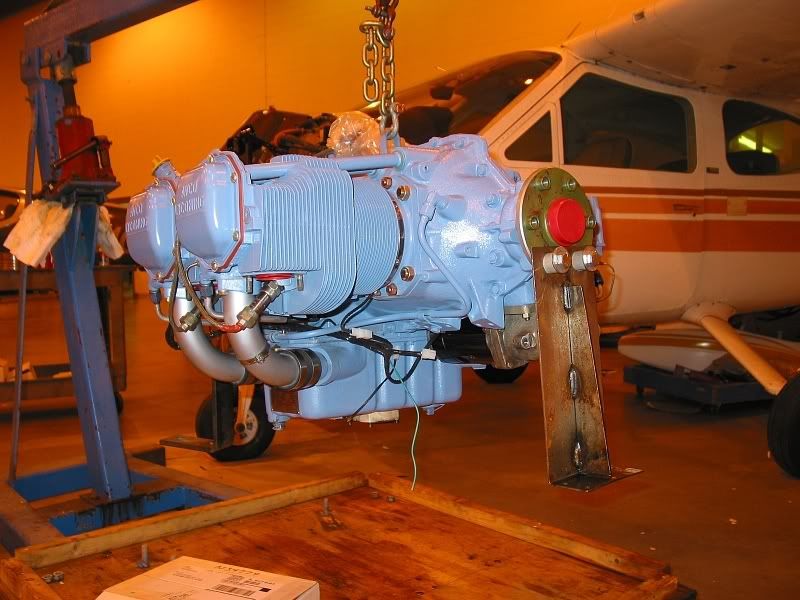 Up on the hoist, she gets the Reiff preheater installed. One of the cylinder bands can be seen as a shiny metal strip at the base of the #1 cylinder barrel. The oil pan heater is out of sight under the engine, but you can see the black wiring harness and white plastic connectors underneath the crankcase. The light gray noodle hanging below is the grounding wire.
 From behind, we see the preheater power cable with a standard AC plug on the end. This will eventually get tied to the oil filler tube, and accessed from the oil filler hatch. The ugly steel thing hanging down from below the oil filler tube is one of the shipping brackets. Apparently it was easier to unbolt the shipping brackets from the crate than to remove the engine from the brackets...
We're getting closer. The guys at the shop expect to start hanging the engine next week. Stay tuned...
Friday, November 16, 2007
Upgrades
I'm still waiting for the shop to find time in their schedule to put Yellowbird back together. For the past three months, I've tried several tactics for dealing with flying withdrawal. I've painted what was paintable fixed what was fixable, and replaced what was replaceable, within the allowances for preventative maintenance spelled out the federal regulations. I've fondled various dismembered airplane parts and dreamed of the day when they would be joined together and whooshing through air as God and Cessna intended. And still it's going to be another month or so before Yellowbird is back in one piece.
In need of some form of aviation therapy, I've turned to shopping. The bank account is already bleeding profusely from the expense of fixing the cracked crankcase, but a few more digits won't be missed, right? I can justify the expense to an extent because with the engine off its mounts, installation will be slightly less expensive. And when you add up the money I've saved by not flying for several months, I think I've almost covered the purchase price of a few extra gadgets.
 First, a Reiff preheat system. We used to have a basic oil pan heater of unknown origin that was installed to replace a Tanis system that was removed when the engine was overhauled in 2001. The oil pan heater did a decent job of warming the oil, but it did little to warm the rest of the engine. I had toyed with a propane fired torpedo heater, ducted through some flexible ducting, but it wasn't very portable, and I was never too keen about pumping superheated fumes (they were hot enough to singe the grass) into the engine compartment. The standard Reiff system includes a heating element for the oil pan as well as heating bands that wrap around the base of each cylinder. This compares to the typical Tanis setup, where the cylinders are heated by elements that plug into the cylinder head temperature probe sockets. I won't attempt a comparison between the two manufactures, but I selected the Reiff system in part because I wanted to keep the CHT sockets available for the next item in our upgrade...
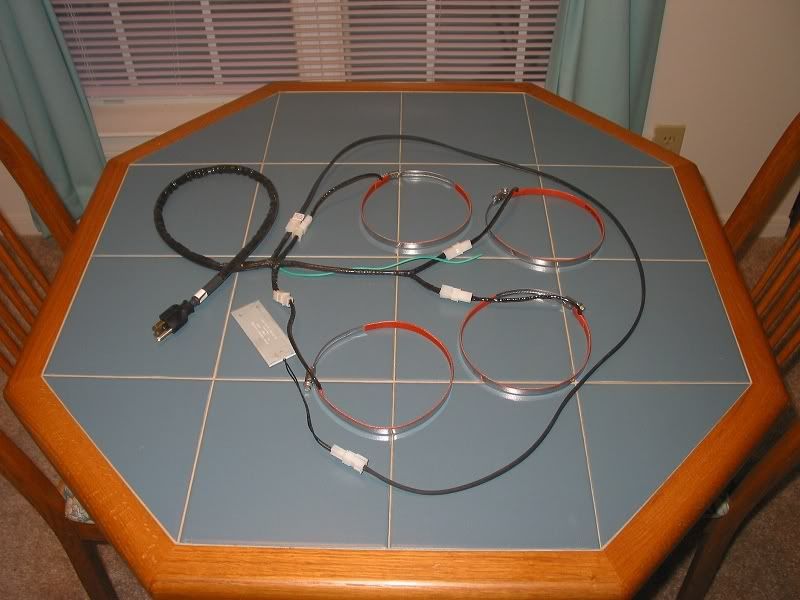
 Here we have a JPI EDM-700 digital engine monitor. This will replace the original Alcor exhaust gas temperature gauge and probe currently fitted to cylinder #3. The EDM-700 will monitor exhaust gas temperature and cylinder head temperature for all four cylinders. I also sprung for the oil temperature and carburetor temperature sensors.
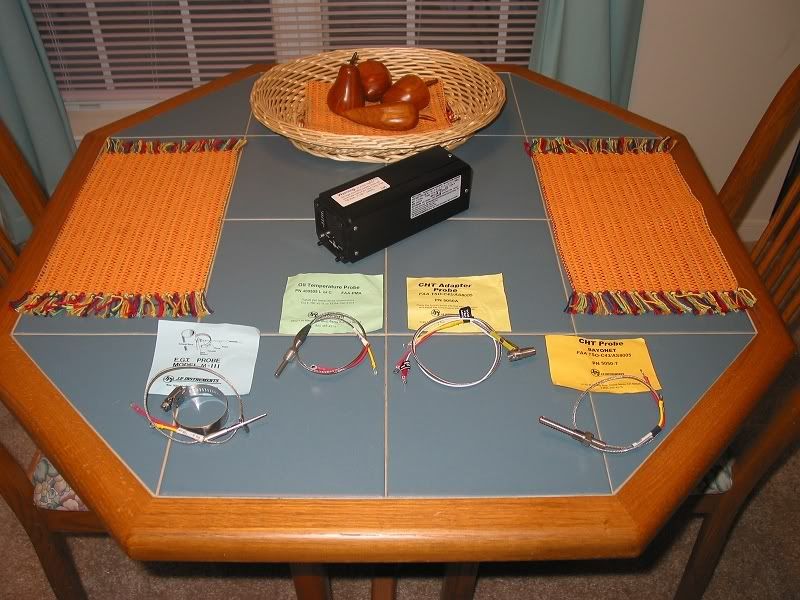
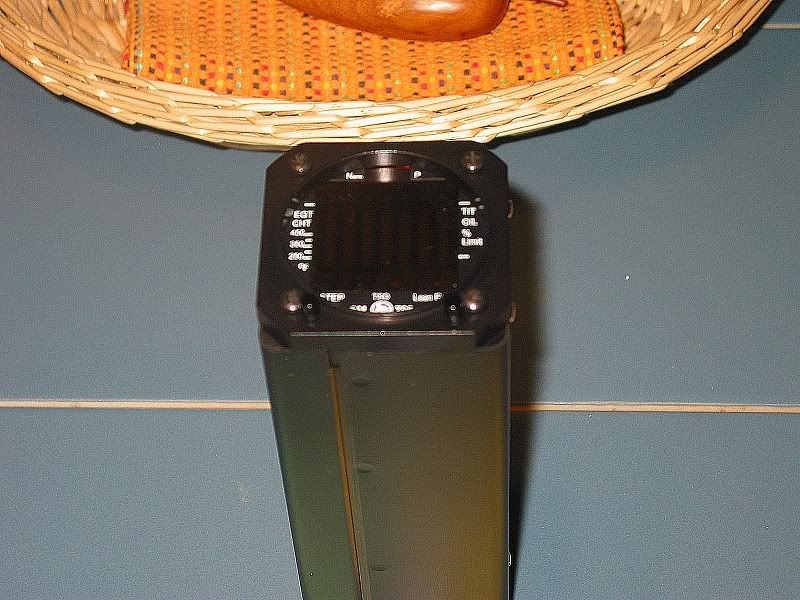 The box itself. Not too exciting when it's off, but when everything is plugged in and running, it will look like this
 The cylinder head temperature sensors screw into threaded sockets on the underside of each cylinder head. I'm not sure what "Bayonet" means in this context - it wouldn't look very threatening fixed to the end of a rifle, and it's nothing like a standard bayonet mounting.
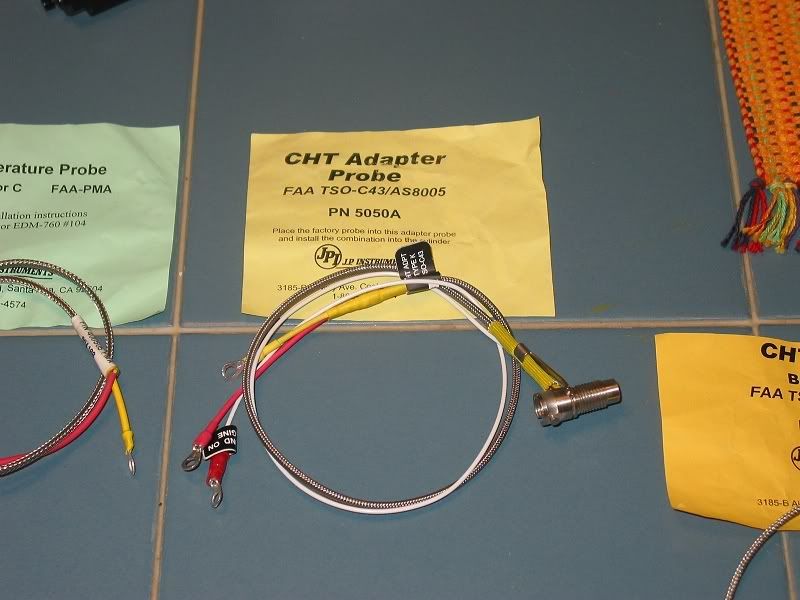 For an additional price, you can have the EDM-700 certified to replace the factory CHT setup, but I'm shedding enough money as it is. Instead, this adapter allows the EDM-700 to share the same socket on the cylinder with the factory CHT probe.
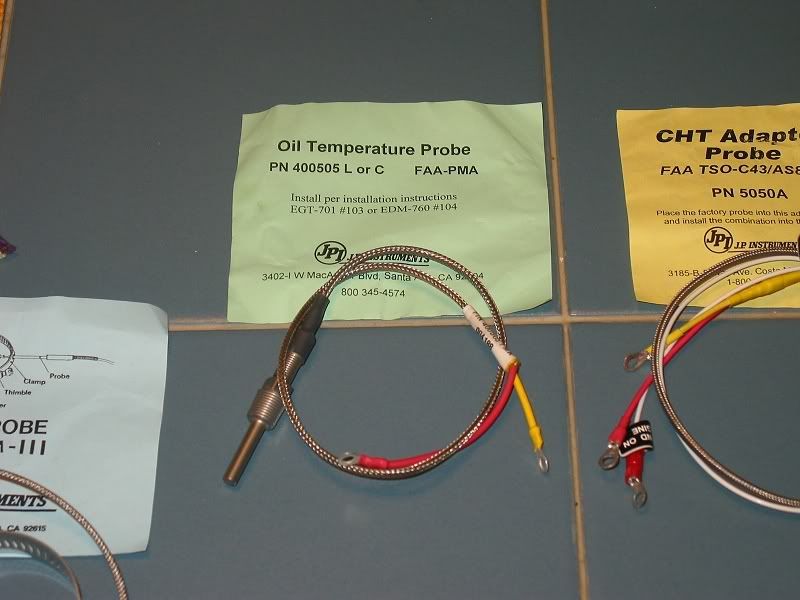 As the little green card says, this is the oil temperature sensor. Part number 400505. L and C presumably stand for Lycoming and Continental.
 The exhaust gas temperature probe goes into a small hole drilled into each exhaust riser, just like in the picture. The clamp holds it in place.
 Arriving too late for the original photo shoot, the carburetor temperature probe goes into a hole thoughtfully provided in the carburetor. The idea is to keep an eye on the temperature in the throat of the carburetor, where frost can grow when sufficient moisture is present in the air and the temperature in the carburetor throat is below freezing (which can occur even when the outside air temperature is above freezing). Carburetor ice is a real threat for many piston engine aircraft, and is blamed for several accidents, including the 1939 crash which destroyed the prototype of the P-38 Lighting fighter of W.W.II fame. Under the right conditions, ice can build up to the point where necessary airflow into the engine is restricted or even completely cut off, resulting in loss of engine power and possibly complete engine stoppage. The normal precaution is to apply carburetor heat (by channeling air warmed by the exhaust into the carburetor intake) during suspect conditions. The carburetor temperature sensor will help identify those conditions.
So there we have it. I'll enjoy looking at these for a few days and then drop them off at the shop. And then the wait continues.
Tuesday, November 06, 2007
Parts
In case you were wondering, this is what it took to get Yellowbird's cracked engine back together:
| Qty | Part # | Description | Unit Price | Extension |
|---|---|---|---|---|
| 1 | CASE-1 | Ovh Crankcase - Lyc 4 Cyl | 1,420.00 | 1,420.00 |
| 1 | AN8-14A | Bolt | 3.40 | 3.40 |
| 1 | AIG6DWD | 0-360-AIG6D Gasket set | 150.00 | 150.00 |
| 8 | 75061 | Bolt - Connecting Rod | 72.71 | 581.68 |
| 8 | SL-12186 | Nut - Connecting Rod Bolt | 3.30 | 26.40 |
| 8 | AEL-13521 | Bearing | 11.47 | 91.76 |
| 4 | AEL-11021 | Bearing | 26.22 | 104.88 |
| 2 | 18A19441 | Bearing - CS Front Main | 163.62 | 327.24 |
| 1 | 72801R | Counterweight - Ovh | 140.00 | 140.00 |
| 8 | LW-14820 | Ring - Internal Retaining | 1.60 | 12.80 |
| 8 | AEL-71907 | Plate - Cwt. Pin Retaining | 17.38 | 139.04 |
| 2 | 14W21696 | Roller - Cwt. | 45.44 | 90.88 |
| 1 | SL-68484 | Tube - Oil | 33.65 | 33.65 |
| 2 | 68H22624 | Cushion - Magneto Dr (3) | 6.45 | 12.90 |
| 4 | LW-14078 | Pin - Piston | 76.30 | 305.40 |
| 8 | 60828 | Plug - Piston Pin | 7.68 | 61.44 |
| 8 | LW-12892 | Button - Rocker Shaft | 4.09 | 32.72 |
| 1 | 12032-4PK | Top Overhaul Gasket Set | 53.16 | 53.16 |
| 5 | LW-11485 | Tube Asm - Pushrod Shroud | 27.25 | 136.25 |
| 1 | SL-68760 | Tube Asm - Cyl #2 Oil Drain | 19.87 | 19.87 |
| 4 | STD-1821 | Hose .38 x 2.50 Long (8) | 1.80 | 7.20 |
| 4 | SL-69603 | Hose - Int 1.75 x 2.188 od | 4.35 | 17.40 |
| 2 | 63D21408 | Nipple Asm - Primer | 21.80 | 43.60 |
| 1 | 06B23072 | Gasket - Oil Filter plate(3) | 30.08 | 30.08 |
| 2 | CH48103-1 | Oil Filter | 28.44 | 56.88 |
| 1 | EH4 | 4 Cyl Exhaust Hardware Kit | 18.40 | 18.40 |
| 1 | LW-12347 | Plate - Prop Gov Pad | 38.34 | 38.34 |
| 1 | MS9144-01 | Gasket - MS9144-01/AMS7283 | 18.50 | 18.50 |
| 2 | 73810 | Bushing - Counterweight | 11.91 | 23.82 |
| 4 | 74637 | Bushing - Rocker valve | 4.82 | 19.28 |
| 1 | LW-15472 | Fuel Pump - Low Pressure | 269.38 | 269.38 |
| 1 | 10-382585 | Contact R/H | 39.05 | 39.05 |
| 4 | SL-3601-SC | Ring Set - Piston | 55.96 | 223.84 |
I'll let you do the math. And labor is not listed.
Saturday, November 03, 2007
It's Here!
Over the last couple of weeks, I've been in contact with Mattituck to finalize the details for the repair of the cracked crankcase. I received the quote at the beginning of October and the work was finished around the middle of the month. Payment was arranged and my engine was in transit again. I got the call yesterday afternoon: It has arrived!
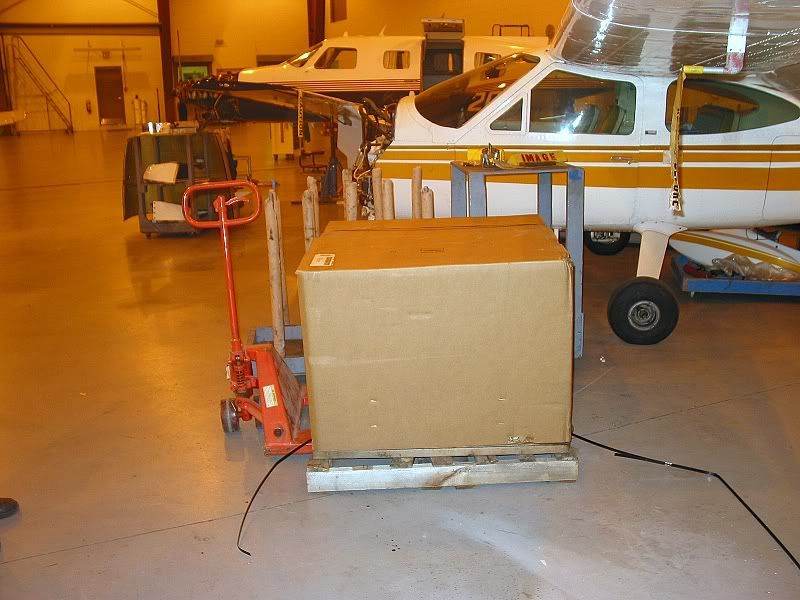 First we have this big box. We originally shipped the engine in a wooden crate provided by Mattituck back in August. I suppose the cardboard crate is for one-way trips.
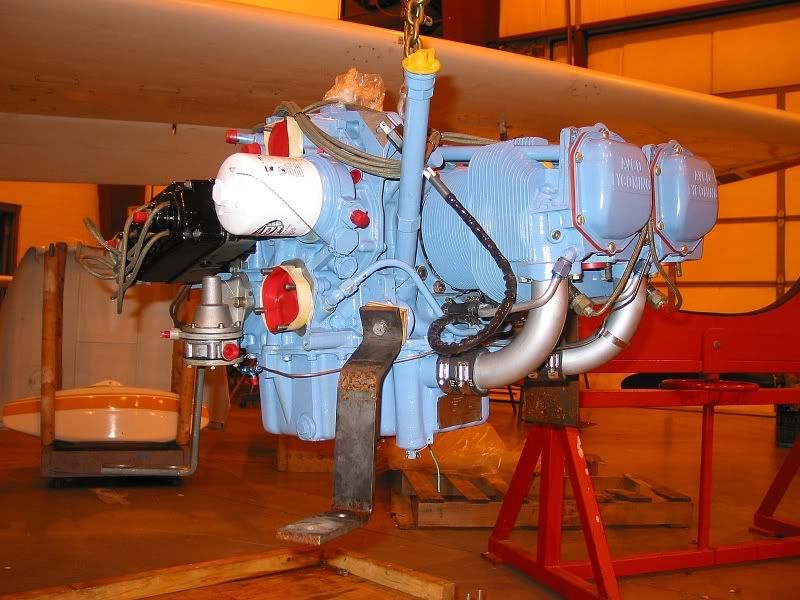
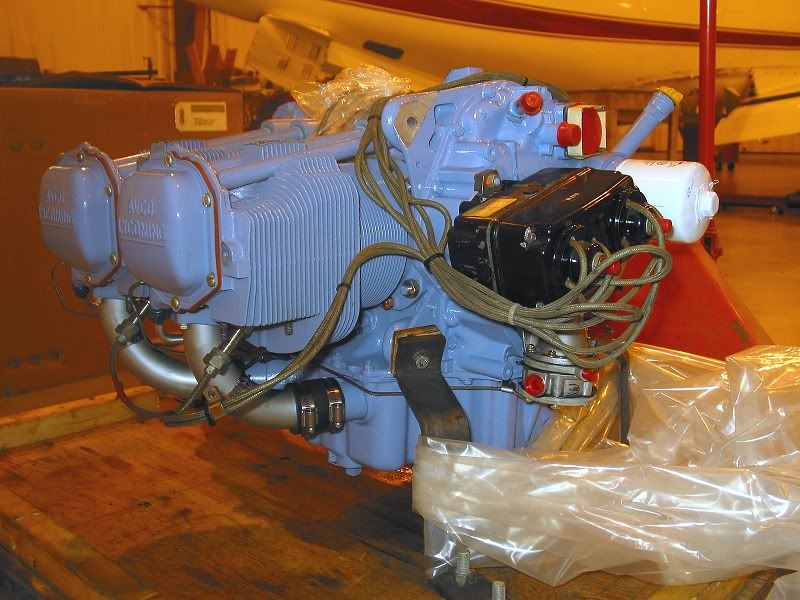
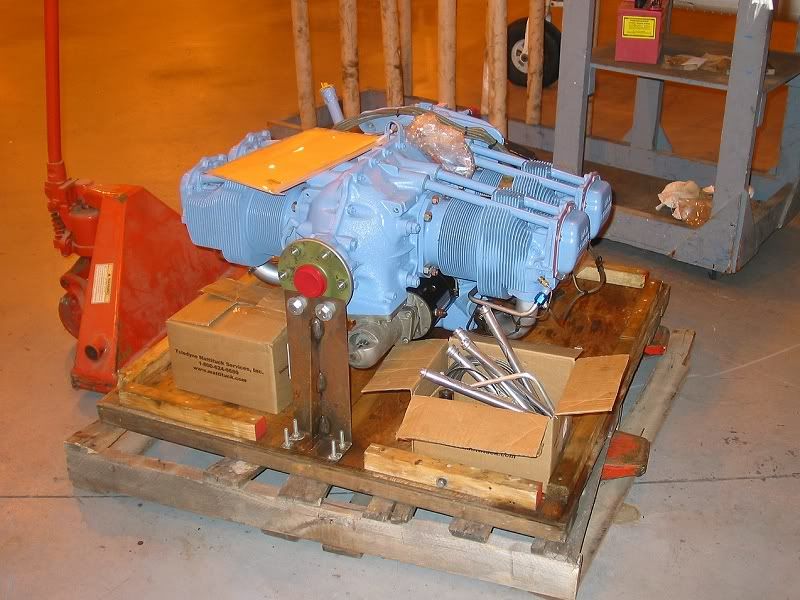 Here it is, the heart of my bird wearing a fresh coat of blue paint. The small box on the left contains the carburetor. The open box on the right appears to hold parts that were replaced. She got new piston rings, assorted tubes and hoses, a crankshaft counterweight, and some pushrod tubes. I'll dig through those later. It should be fun, kind like looking at your appendix in a jar of formaldehyde after the operation.
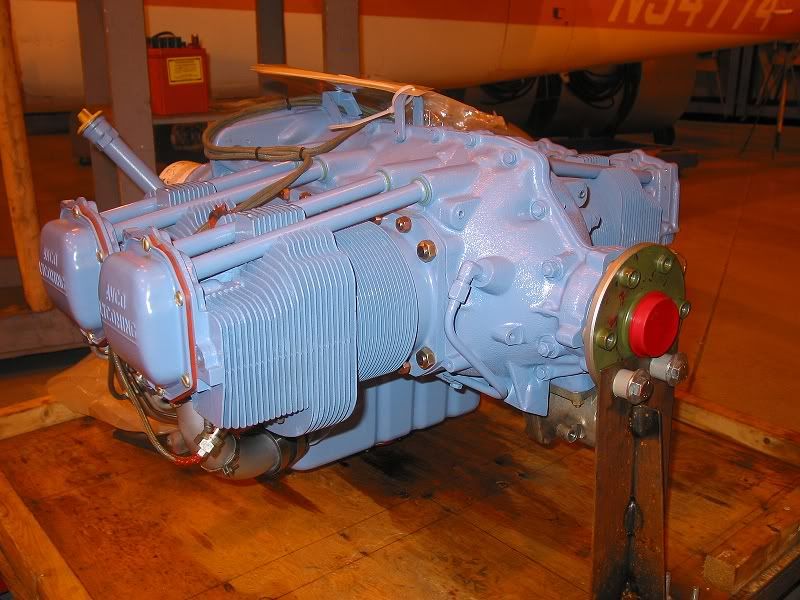 It really looks spiffy - fresh hardware and gaskets, and that lovely blue paint.
 It looks like everything was cleaned up. Only six years out of the original overhaul, it was getting somewhat grimy. Now it looks almost new. The engine logs are in the package on top.
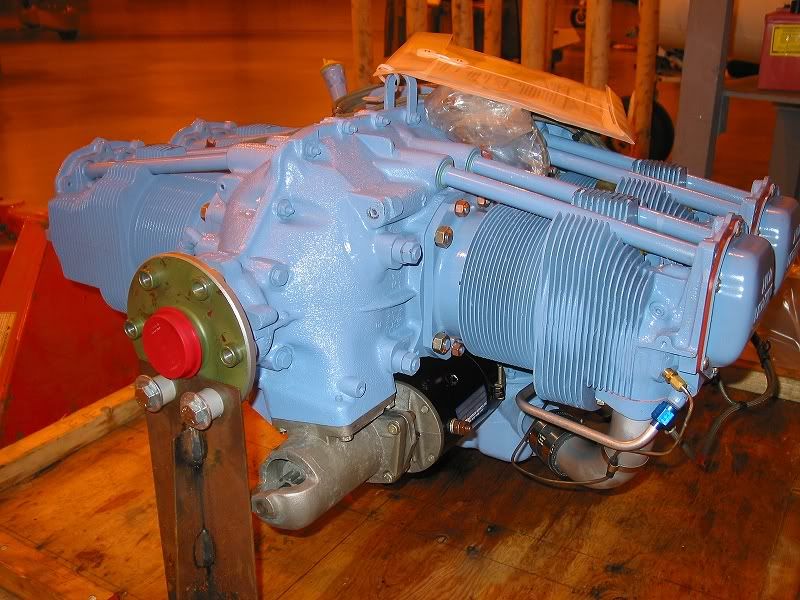
 Back view showing the oil filter and assorted accessory mounting pads covered with plastic plugs.
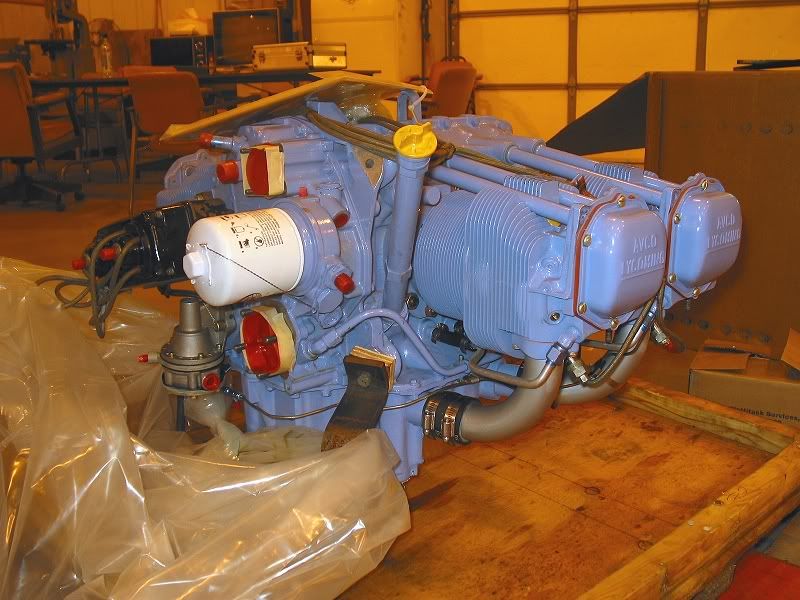
 Magneto and fuel pump below it. Those ignition leads look pretty ratty, now that the rest of the engine has been freshened up.
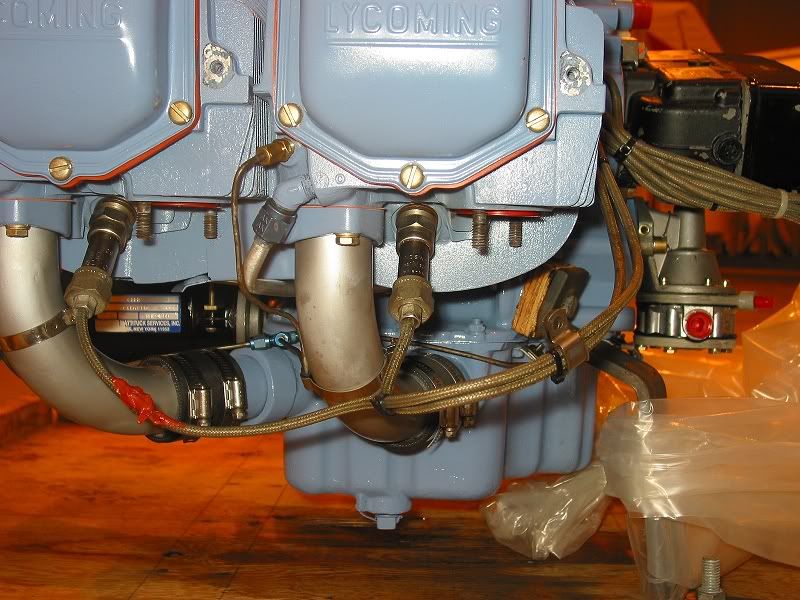 Curious: the spark plugs were removed before we shipped the engine to Mattituck. They had to have put plugs in when they test ran the engine, and for some reason, they left the bottom plugs in. I didn't see spark plugs on the invoice, so maybe I'm up half a set of plugs on the whole deal?
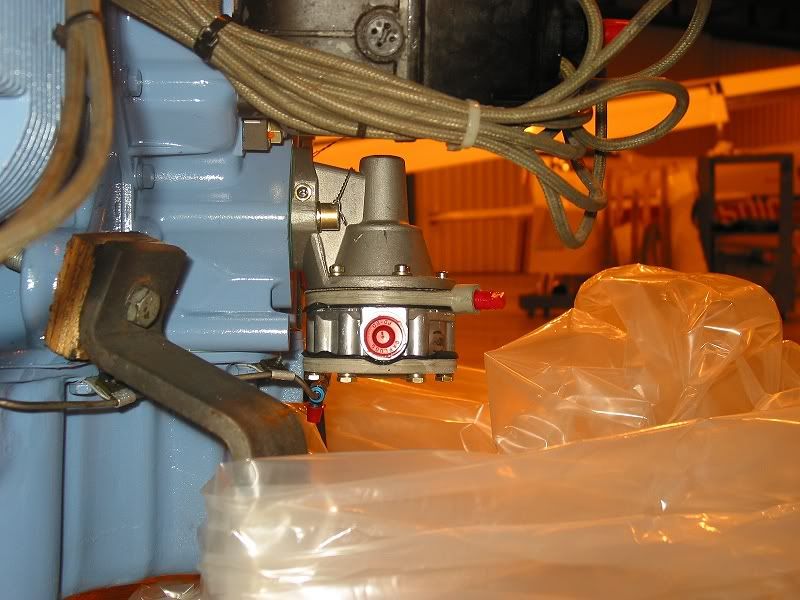 I did get a new fuel pump out of the whole adventure.
It's nice to have everything back in the same hangar, even if she's in pieces. For now, I may have to settle for the pieces. The shop has a full schedule and it may be a few weeks before they can resume work on Yellowbird. What was hoped to be a one-week annual inspection has run three months so far. There are still some discrepancies from the inspection to be taken care of, and our biennial IFR check is due this month. I don't see all of that finishing up before the end of the month, so I guess I can sit back, wait, and ogle my engine.
