Tuesday, December 04, 2007
Hanging the Engine: Day 1
Today is the day. Yellowbird has found a place in the shop's schedule and it's time to start reinstalling her engine, which was removed back in August to have a cracked crankcase fixed. The engine arrived about a month ago, but the shop was booked solid with other aircraft until now. Shall we watch?
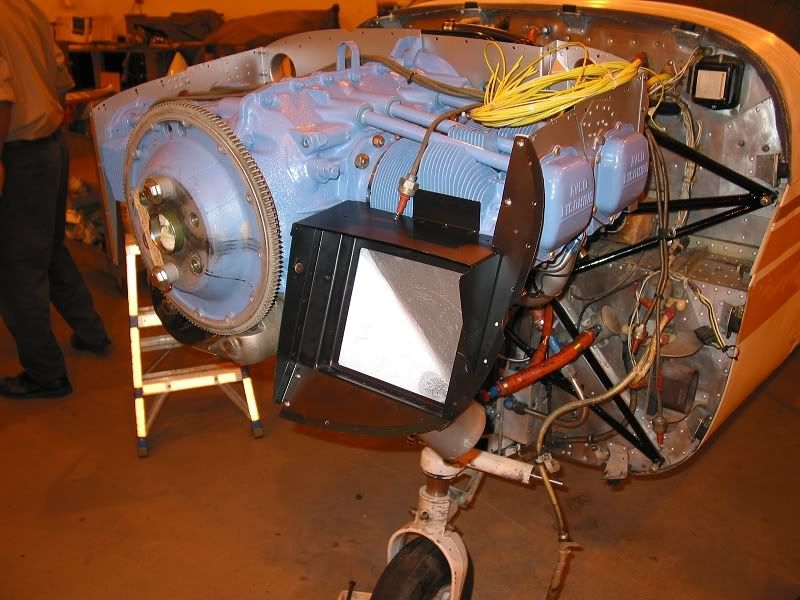
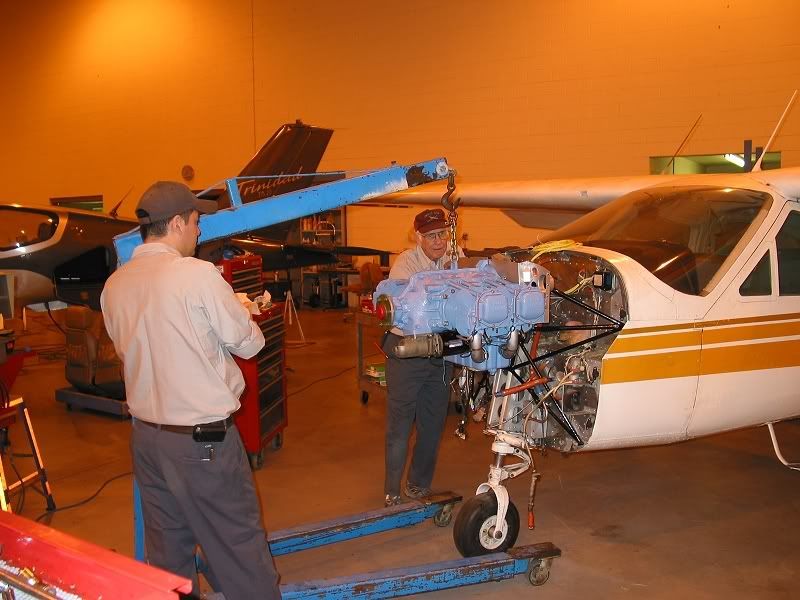 Aloft again, the engine is finally mated to its mount. We got new rubber shock mounts all around. They're not cheap, but it made sense to replace them while the engine was off. The magnetos have been temporarily removed to provide better clearance around the engine mount. The rear baffles were installed before hanging the engine.
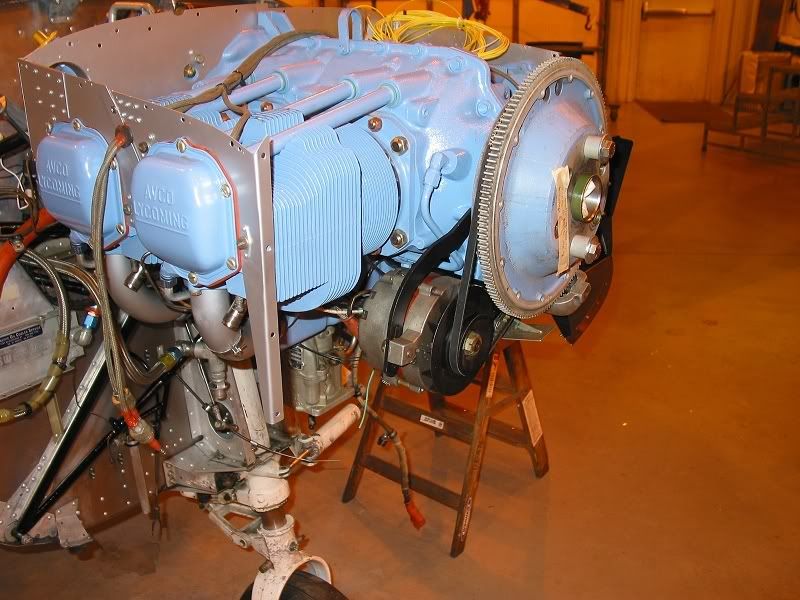
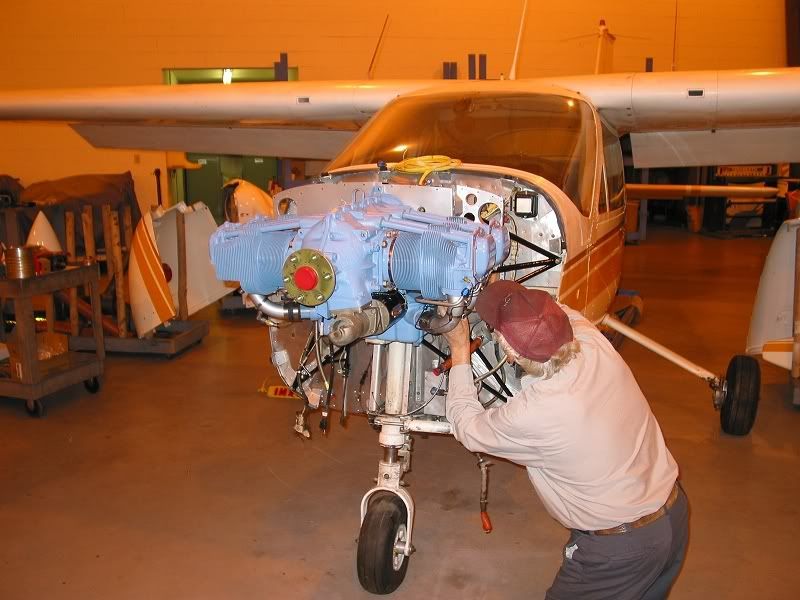 Together at last. Now begins the long task of installing various engine accessories (carburetor, exhaust, alternator, magnetos, vacuum pump, propeller and governor) as well as all of the fuel and oil lines, electrical connections, and control cables.
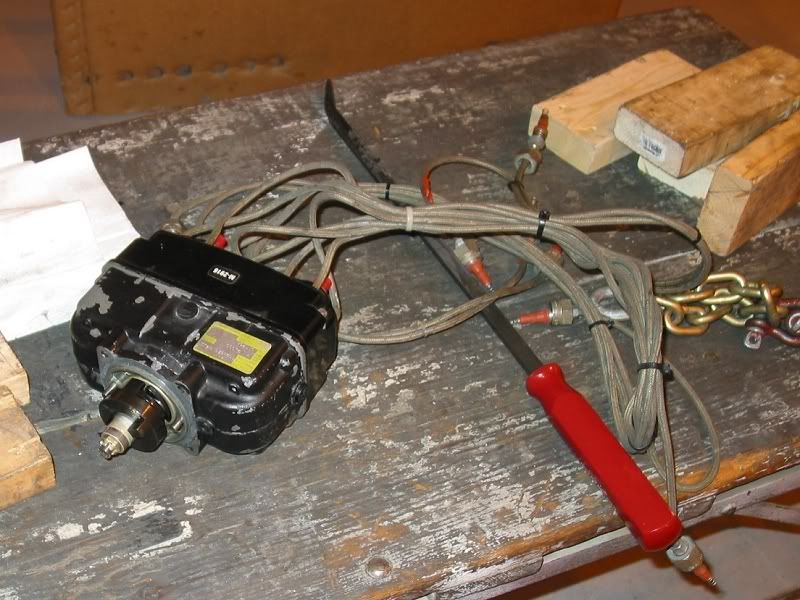 Set aside for the moment, the dual magneto and ignition leads.
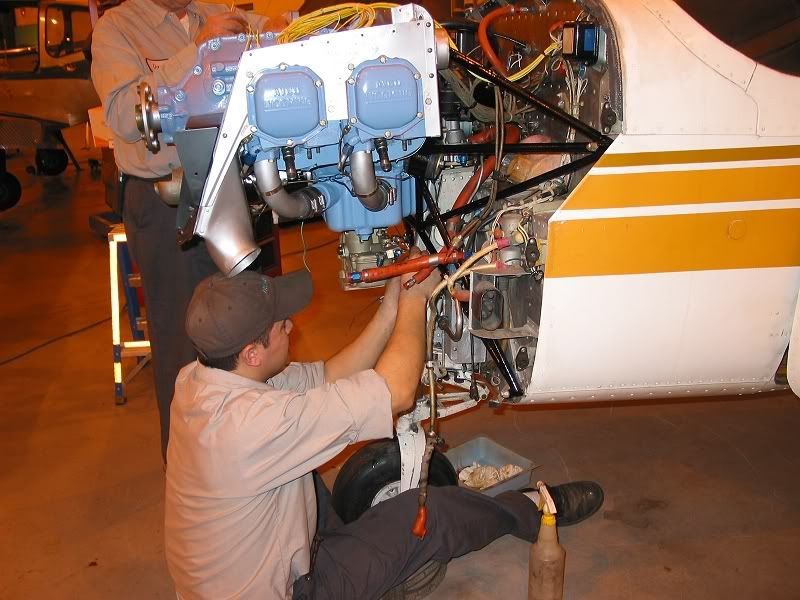 Progressing along, Ray hooks up the carburetor. The red hoses in front of his hands are fuel lines. The wire with a red connector hanging down by his knee is the starter power cable. The cylinder side baffles and the forward baffle incorporating the carburetor air intake have been installed, but the baffle seals will probably go on after everything else has been completed.
 The carburetor air intake and starter ring in place. The air filter will eventually fill the square opening in the intake. The magnetos have been installed, evidenced by the ignition leads which can be seen atop the engine. The bundle of yellow wire is the harness for the JPI CHT and EGT sensors.
 The alternator all snug in its bracket. The alternator belt goes around a groove in the back of the starter ring, which is held on by temporary bolts and spacers until the propeller is installed. The ignition leads to the bottom spark plugs for cylinders 1 and 3 can be seen as they feed through a rubber grommet in the baffles between the two cylinders. The forward baffle on this side is yet to be installed.
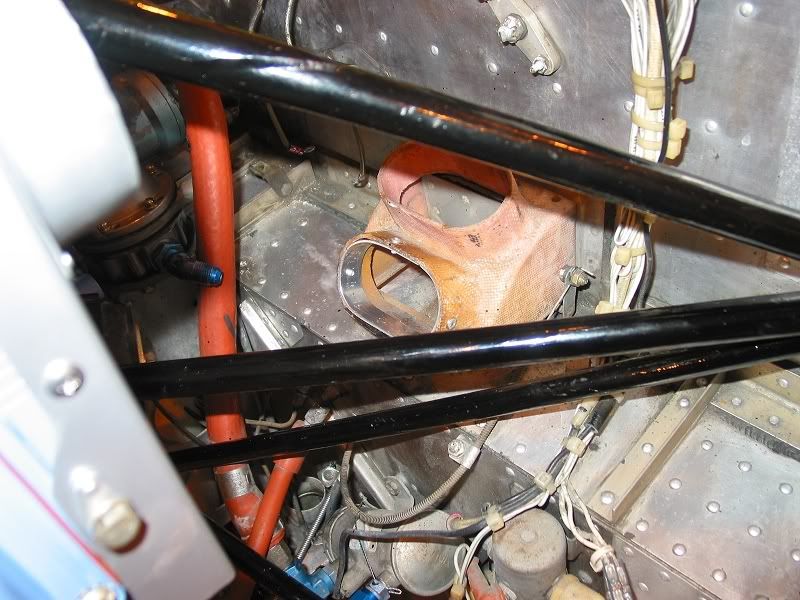 I wish I had taken a better picture of this before the engine was hung. This is the cabin heat valve attached to the firewall. The upper opening admits fresh air ducted from an intake in the rear baffles above cylinder #4. The lower opening admits heated air from the muffler shroud. A flap inside the valve directs either fresh or heated air (or a combination of the two) into the heater manifold inside the cabin. You can see an aluminum strip inside the lower opening - this is Ray's tidy repair to the flange, which had been warped thanks to a combination of heat and overtightening of the clamp which held the SCAT duct to the valve. Prior to his repair, it looked like this.
Well that's it for today. This morning Yellowbird was a hulk, devoid of her heart. Now she's starting to look like an airplane again. We'll come back tomorrow to watch the revival continue.
